Thursday, December 9, 2021
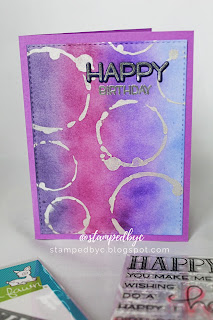
Purple and Silver Birthday Card using DIY Stencils
DIY Stencils Using Cricut or Silhouette
Stencils are definitely on trend right now, and there are many options available on the market.
However, if you're looking for a specific stencil and can't find it, or if you're just trying to stretch your crafting budget, then this hack can definitely help you!
If you have an electronic cutting machine (like a Cricut or a Silhouette), you can use these bad boys to cut any stencil that your crafty heart desires.
To cut this actual stencils, I used my Silhouette Cameo. However, I'll show you how to do this with a Cricut using Design Space.
You'll need your Cricut Explore Air (or Cricut Maker), a 12x12 Cricut cutting mat (light grip or standard grip) and 6x6 square of acetate.
1. Launch Design Space. Click on "Image."
2. On the Search bar, type "Stencil."
Sunday, December 21, 2014
Organization: Cricut Cartridges
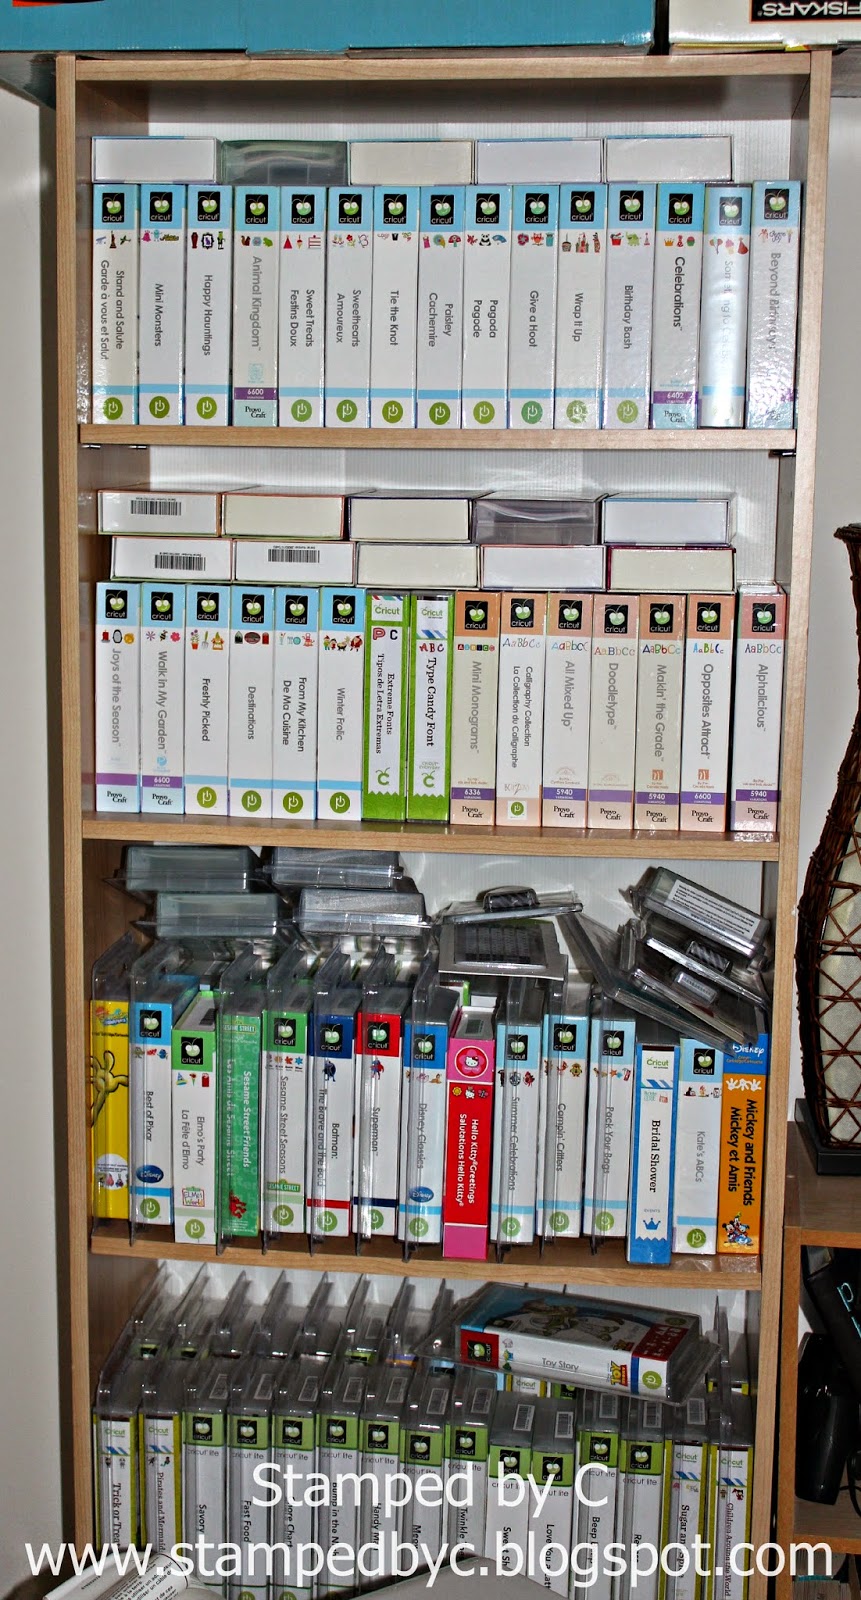
I noticed that most of my craft room "real estate" was taken up by my Cricut cartridges. I have over 150 of them, and all of them are still in their original boxes. And some are even unopened. Here, take a look:
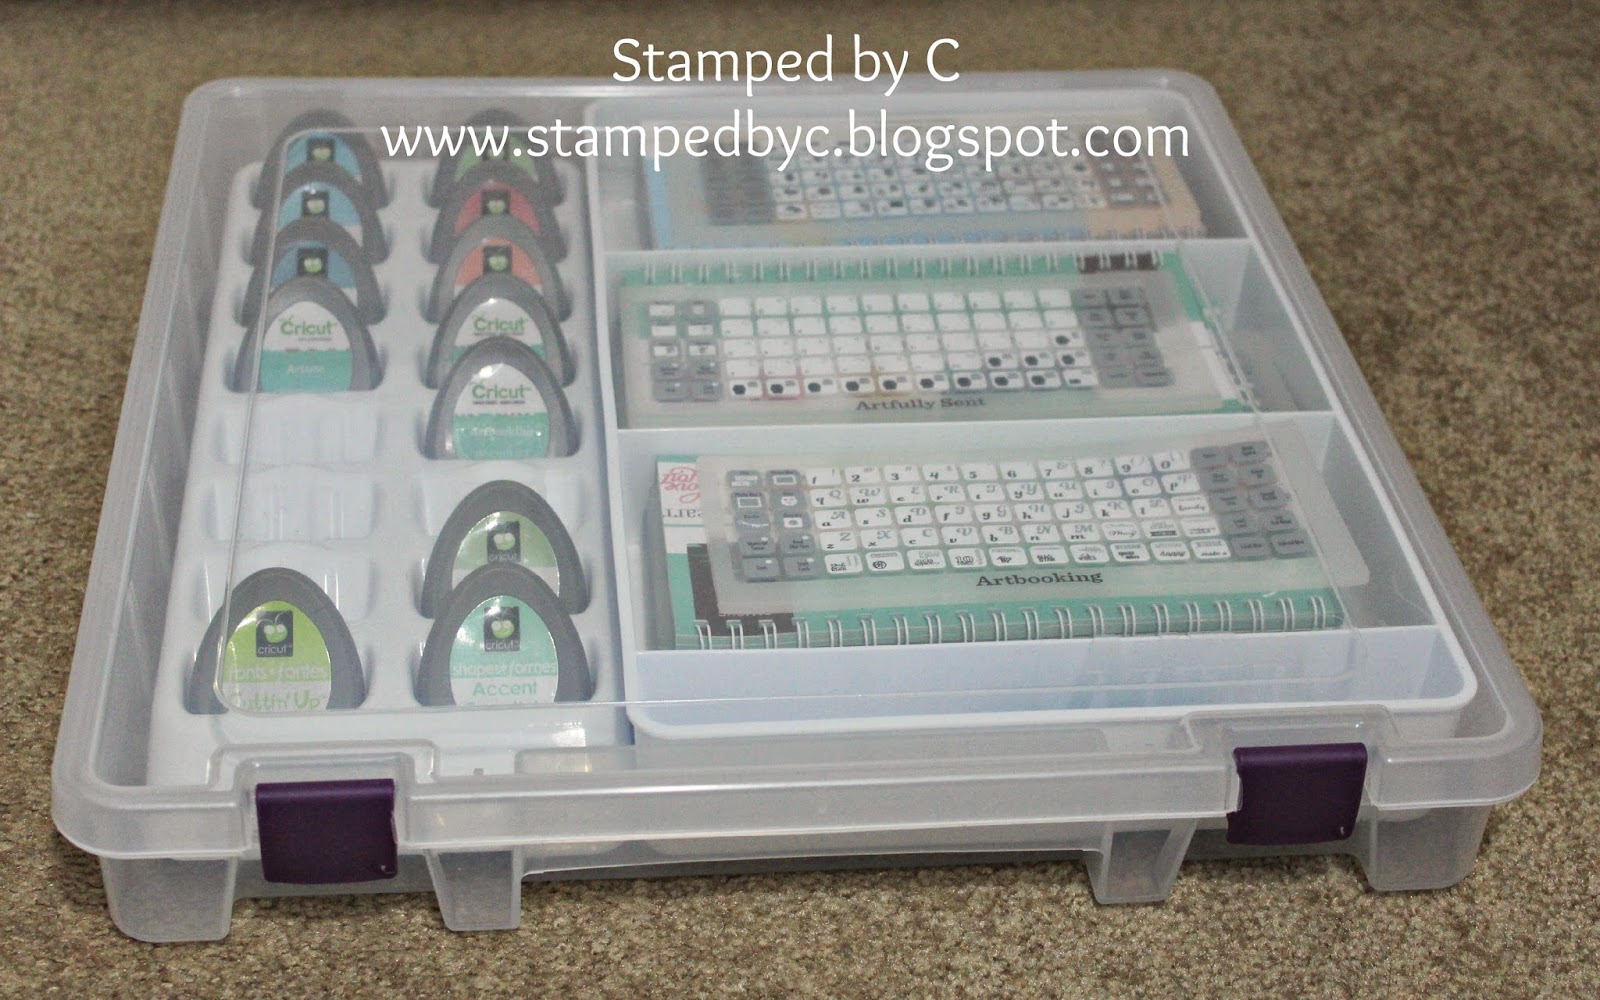
I kept the handbooks and overlays in these boxes, which I got here. I triedd to fit the same number of handbooks and overlays in each box (84 each). It was great that I had a mix of different cartridges, with Lite handbooks.
And then for my active project (I am currently working on r's baby book), I'm keeping all the cartridges, handbooks, and overlays in this box.
I'm so happy that I found this method of storing cartridges. Now I know exactly what I have, and can easily reach for what I need.
Give this method a try, and let me know what you think.
Thanks for looking, and have a great day!
Thursday, June 12, 2014
r's Elmo-themed 2nd Birthday Party
He loves Elmo, and so we decided to host an Elmo-themed birthday party for him and his friends. Everyone had a great time!
I started brainstorming party ideas in March, so you can imagine me going crazy about party details, decorations, etc. R, my husband, pretty much gave me all the freedom to decide on things I liked for the party, which I thought was nice of him. He only told me to "not go too crazy," which I promised I wouldn't. Famous last words.
Here's the invitation we sent out to r's friends:
I chose a simpler design this year, compared to last year's invitation, so it was much easier to mass produce.
And then, the party decorations.
I made this Elmo "Happy Birthday" banner using my Cricut and Silhouette Cameo cutting machines.
The banner and the letters were cut with the Cricut. The medallions were cut with the Silhouette. We're not allowed to hang or stick anything to the party room's walls/furniture, etc., so I planned to put this banner on the sweets table, together with letters of r's name, and the number "2."
These letters and number are 3D boxes, which I got from the Silhouette store. I loved how they are able to stand by themselves. After the party, I planned to use these as decor in r's bedroom.
Here's a photo of the sweets table:
r's birthday cake is not in the photo, because I was still picking it up. :p
I made these chocolate cupcakes and topped them with Elmo's icing decoration (from Wilton).
We also had Elmo chocolate lollipops, chocolate-covered Oreo's with Elmo's face, and Dorothy marshmallows. I got the idea for the Dorothy marshmallows in Pinterest.
Unfortunately, I was not able to take close-up photos of the other treats, but you can see them a little bit (at least, I hope you can) on the photo of the sweets table.
And no, we did not just feed the guests dessert. :p We also had Caesar salad, vegetables and dip, chips and spinach dip, cheese and crackers, Dorothy goldfish crackers, four different kinds of pizza (since half of the guests were at the picky-eater age), three-cheese tortellini, roasted chicken, and fruits. We served water, pop, and juice for drinks.
I don't have a photo of the individual tables, but each table was covered in red table cloth, with a Dorothy the Goldfish centerpiece, again, thanks to Pinterest.
And then we had the goody bags. I printed each guest's name on a label with an Elmo clip art, and attached it to white paper bags from Michael's.
I made these Elmo water bottles using red water bottles from Michael's, and stickers of Elmo's face (that I made myself):
I also included in the goody bags: a small red beach ball, bubbles, and Playdoh.
And then we gave each guest a party hat. I got this idea from Pinterest.
We also gave the guests some crayons and Elmo coloring sheets while waiting for the program to start.
And then, the guest of honor arrived, and he played and danced with r and his friends.
By the end of the party, we were all pretty tired, but so happy, since everyone had a blast! It made all the prepations and hard work all worth it.
Thanks for looking, and have a great day!


